How to Tighten Moen Bathroom Sink Faucet: A Step-by-Step DIY Guide
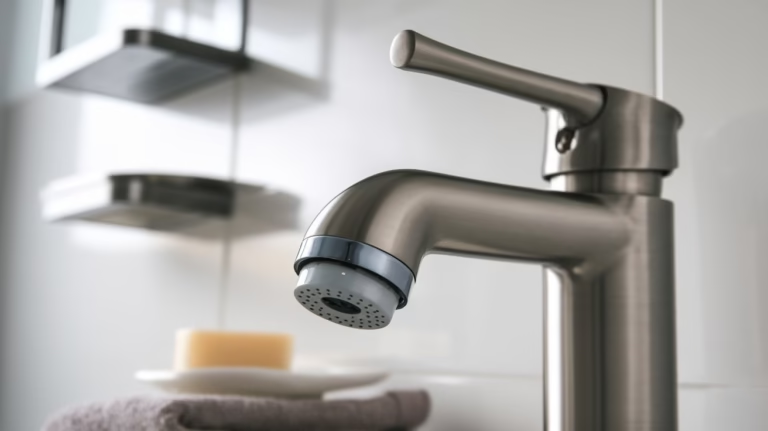
Moen Bathroom Sink Faucet
Let’s face it—loose faucets are one of those household nuisances that can drive you up the wall. That constant wobble every time you turn the handle? Not only is it annoying, but it can also lead to leaks, water damage, or even a full-blown plumbing disaster. If you’ve got a Moen bathroom sink faucet that’s come loose, you’re in luck!
Tightening it is a straightforward DIY task that can save you time, money, and a call to the plumber. Plus, did you know that leaky faucets can waste up to 3,000 gallons of water per year per household, according to the Environmental Protection Agency (EPA)?
The Problem – Water Wasted Annually
💧 1 Drip per Second = 3,000 Gallons Wasted per Year!
🛑 Household leaks waste nearly 1 trillion gallons of water annually!
🔹 Equivalent to the annual water usage of 11 million homes.
Let’s tighten that faucet and stop the wobble (and the waste) for good!
What You’ll Need
Before we dive in, gather these tools and supplies:
- Adjustable wrench or basin wrench
- Screwdriver (flathead or Phillips, depending on your faucet)
- Flashlight (for those dark under-sink spaces)
- Towel or rag (to protect surfaces and clean up)
- Plumber’s putty or silicone caulk (if resealing is needed)

DIY Guide to Tighten Moen Bathroom Sink Faucet
Step 1: Turn Off the Water Supply
First things first—safety! Locate the water supply valves under your sink (they’re usually small knobs or levers). Turn them clockwise to shut off the water. Then, turn on the faucet to drain any remaining water from the lines. This step ensures you won’t get an unexpected splash while working.
Step 2: Inspect the Faucet

Take a moment to examine your Moen faucet. Is it a single-handle or double-handle model? Most Moen faucets are secured by mounting nuts underneath the sink. If your faucet is loose, these nuts are likely the culprits.
Fun fact: Moen is one of the most trusted faucet brands in the U.S., with a customer satisfaction rate of over 90%, according to a 2022 J.D. Power study. But even the best faucets can loosen over time due to regular use.
Step 3: Access the Mounting Nuts
Here’s where the real work begins. Grab your flashlight and peek under the sink. You’ll see one or two mounting nuts holding the faucet in place. If your sink cabinet is cluttered, now’s the time to clear it out. Trust me, you’ll appreciate the extra elbow room!
Step 4: Tighten the Mounting Nuts
- Wrap a towel around the jaws of your wrench to protect the sink and pipes from scratches.
- Gently tighten the nuts by turning them clockwise. Be careful not to overtighten—this could crack the sink or damage the faucet.
- If the nuts are hard to reach, a basin wrench is your best friend. Its long handle and pivoting head make it perfect for tight spaces.
Pro tip: If the nuts are corroded or damaged, consider replacing them. Moen offers affordable replacement parts that are easy to find online or at your local hardware store.
Step 5: Check for Stability
Once the nuts are snug, give the faucet a gentle wiggle to test its stability. If it still feels loose, double-check the nuts and tighten them a bit more. A stable faucet not only feels better to use but also prevents wear and tear on the plumbing.
Step 6: Reattach Any Components
If you removed the faucet handles or decorative caps to access the mounting nuts, now’s the time to put them back. Use your screwdriver to secure any screws, and make sure everything looks neat.
Step 7: Turn the Water Supply Back On
Slowly turn the water supply valves back on and test the faucet. Check for leaks around the base. If you notice any water seeping through, you may need to reseal the faucet with a plumber’s putty or silicone caulk.
Did you know? The average household leak can waste nearly 10,000 gallons of water annually, according to the EPA. Fixing a loose faucet is a small step that can make a big difference for your wallet and the environment.
Step 8: Clean Up and Admire Your Work
Wipe down the sink and faucet to remove any fingerprints or debris. Step back and admire your handiwork—your Moen faucet should now be as stable as the day it was installed.
Why This Matters
Tightening a loose faucet isn’t just about convenience—it’s about preventing bigger problems down the line. A wobbly faucet can lead to leaks, water damage, and even mold growth. Plus, with water bills rising by an average of 5% annually in many areas, fixing small issues like this can save you money in the long run.
Comparison to Everyday Water Usage
🚰 How Much Water Do You Use Daily?
| Activity | Water Used |
|---|---|
| Brushing Teeth (Tap Running) | 4 gallons/min |
| Dishwasher Cycle | 6 gallons/load |
| 5-Minute Shower | 10-15 gallons |
| Washing Machine Load | 20 gallons |
| Daily Household Use (Avg.) | 82 gallons |
Pro Tips for Long-Term Maintenance
- Check Regularly: Give your faucet a quick wiggle test every few months to ensure it stays tight.
- Upgrade if Needed: If your Moen faucet is older, consider upgrading to a newer model with advanced features like MotionSense or Spot Resist finish.
- Use Quality Parts: Always opt for genuine Moen replacement parts to ensure compatibility and durability.
Tightening a Moen bathroom sink faucet is a quick, easy, and rewarding DIY project. With just a few tools and a little effort, you can stop the wobble, prevent leaks, and keep your bathroom in tip-top shape. So, roll up your sleeves and get to it—your sink (and your sanity) will thank you! 🛠️🚰
Sources: